Rotations
Related Topics:
Lesson Plans and Worksheets for Geometry
Lesson Plans and Worksheets for all Grades
More Lessons for Geometry
Common Core For Geometry
New York State Common Core Math Geometry, Module 1, Lesson 13
Student Outcomes
- Students manipulate rotations by each parameter—center of rotation, angle of rotation, and a point under the rotation.
Rotations
Classwork
Exploratory Challenge
You need a pair of scissors and a ruler.
Cut out the 75° angle on the right and use it as a guide to rotate the figure below 75° counterclockwise around the given center of rotation (Point 𝑃).
- Place the vertex of the 75° angle at point 𝑃.
- Line up one ray of the 75° angle with vertex 𝐴 on the figure. Carefully measure the length from point 𝑃 to vertex 𝐴.
- Measure that same distance along the other ray of the reference angle, and mark the location of your new point, 𝐴′.
- Repeat these steps for each vertex of the figure, labeling the new vertices as you find them.
- Connect the six segments that form the sides of your rotated image.
Discussion
In Grade 8, we spent time developing an understanding of what happens in the application of a rotation by participating in hands-on lessons. Now, we can define rotation precisely. First, we need to talk about the direction of the rotation. If you stand up and spin in place, you can either spin to your left or spin to your right. This spinning to your left or right can be rephrased using what we know about analog clocks: spinning to your left is spinning in a counterclockwise direction, and spinning to your right is spinning in a clockwise direction. We need to have the same sort of notion for rotating figures in the plane. It turns out that there is a way to always choose a counterclockwise half-plane for any ray: The counterclockwise half-plane of 𝐶𝑃 is the half-plane of 𝐶𝑃 that lies to the left as you move along 𝐶𝑃 in the direction from 𝐶 to 𝑃. (The clockwise half-plane is then the half-plane that lies to the right as you move along 𝐶𝑃 in the direction from 𝐶 to 𝑃.) We use this idea to state the definition of rotation.
For 0° < 𝜃° < 180°, the rotation of 𝜃 degrees around the center 𝐶 is the transformation 𝑅𝐶,𝜃 of the plane defined as follows:
- For the center point 𝐶, 𝑅𝐶,𝜃 (𝐶) = 𝐶, and
- For any other point 𝑃, 𝑅𝐶,𝜃 (𝑃) is the point 𝑄 that lies in the counterclockwise half-plane of 𝐶𝑃 , such that 𝐶𝑄 = 𝐶𝑃 and 𝑚∠𝑃𝐶𝑄 = 𝜃°.
A rotation of 0 degrees around the center 𝐶 is the identity transformation (i.e., for all points 𝐴 in the plane, it is the rotation defined by the equation 𝑅𝐶,0(𝐴) = 𝐴).
A rotation of 180° around the center 𝐶 is the composition of two rotations of 90° around the center 𝐶. It is also the transformation that maps every point 𝑃 (other than 𝐶) to the other endpoint of the diameter of a circle with center 𝐶 and radius 𝐶𝑃.
- A rotation leaves the center point 𝐶 fixed. 𝑅𝐶,𝜃 (𝐶) = 𝐶 states exactly that. The rotation function 𝑅 with center point 𝐶 that moves everything else in the plane 𝜃°, leaves only the center point itself unmoved.
- Any other point 𝑃 in the plane moves the exact same degree arc along the circle defined by the center of rotation and the angle 𝜃°.
- Then 𝑅𝐶,𝜃 (𝑃) is the point 𝑄 that lies in the counterclockwise half-plane of ray ⃗𝐶𝑃⃗⃗⃗⃗ such that 𝐶𝑄 = 𝐶𝑃 and such that 𝑚∠𝑃𝐶𝑄 = 𝜃°. Visually, you can imagine rotating the point 𝑃 in a counterclockwise arc around a circle with center 𝐶 and radius 𝐶𝑃 to find the point 𝑄.
- All positive angle measures 𝜃 assume a counterclockwise motion; if citing a clockwise rotation, the answer should be labeled with CW. A composition of two rotations applied to a point is the image obtained by applying the second rotation to the image of the first rotation of the point. In mathematical notation, the image of a point 𝐴 after a composition of two rotations of 90° around the center 𝐶 can be described by the point 𝑅𝐶,90 (𝑅𝐶,90(𝐴)). The notation reads, “Apply 𝑅𝐶,90 to the point 𝑅𝐶,90(𝐴).” So, we lose nothing by defining 𝑅𝐶,180(𝐴) to be that image. Then, 𝑅𝐶,180(𝐴) = 𝑅𝐶,90 (𝑅𝐶,90(𝐴)) for all points 𝐴 in the plane.
In fact, we can generalize this idea to define a rotation by any positive degree: For 𝜃° > 180°, a rotation of 𝜃° around the center 𝐶 is any composition of three or more rotations, such that each rotation is less than or equal to a 90° rotation and whose angle measures sum to 𝜃°. For example, a rotation of 240° is equal to the composition of three rotations by 80° about the same center, the composition of five rotations by 50°, 50°, 50°, 50°, and 40° about the same center, or the composition of 240 rotations by 1° about the same center.
Notice that we have been assuming that all rotations rotate in the counterclockwise direction. However, the inverse rotation (the rotation that undoes a given rotation) can be thought of as rotating in the clockwise direction. For example, rotate a point 𝐴 by 30° around another point 𝐶 to get the image 𝑅𝐶,30(𝐴). We can undo that rotation by rotating by 30° in the clockwise direction around the same center 𝐶. Fortunately, we have an easy way to describe a rotation in the clockwise direction. If all positive degree rotations are in the counterclockwise direction, then we can define a negative degree rotation as a rotation in the clockwise direction (using the clockwise half-plane instead of the counterclockwise half-plane). Thus, 𝑅𝐶,-30 is a 30° rotation in the clockwise direction around the center 𝐶. Since a composition of two rotations around the same center is just the sum of the degrees of each rotation, we see that
𝑅𝐶,-30 (𝑅𝐶,30(𝐴)) = 𝑅𝐶,0(𝐴) = 𝐴,
for all points 𝐴 in the plane. Thus, we have defined how to perform a rotation for any number of degrees—positive or negative.
As this is our first foray into close work with rigid motions, we emphasize an important fact about rotations. Rotations are one kind of rigid motion or transformation of the plane (a function that assigns to each point 𝑃 of the plane a unique point 𝐹(𝑃)) that preserves lengths of segments and measures of angles. Recall that Grade 8 investigations involved manipulatives that modeled rigid motions (e.g., transparencies) because you could actually see that a figure was not altered, as far as length or angle was concerned. It is important to hold onto this idea while studying all of the rigid motions.
Constructing rotations precisely can be challenging. Fortunately, computer software is readily available to help you create transformations easily. Geometry software (such as Geogebra) allows you to create plane figures and rotate them a given number of degrees around a specified center of rotation. The figures in the exercises were rotated using Geogebra. Determine the angle and direction of rotation that carries each pre-image onto its (dashed-line) image. Assume both angles of rotation are positive. The center of rotation for Exercise 1 is point 𝐷 and for Figure 2 is point 𝐸.
Exercises 1–3
- To determine the angle of rotation, you measure the angle formed by connecting corresponding vertices to the center
point of rotation. In Exercise 1, measure ∠𝐴𝐷′𝐴′. What happened to ∠𝐷? Can you see that 𝐷 is the center of rotation,
therefore, mapping 𝐷′ onto itself? Before leaving Exercise 1, try drawing ∠𝐵𝐷′𝐵′. Do you get the same angle measure?
What about ∠𝐶𝐷′𝐶′?
Try finding the angle and direction of rotation for Exercise 2 on your own. - Did you draw ∠𝐷𝐸𝐷′ or ∠𝐶𝐸𝐶′?
Now that you can find the angle of rotation, let’s move on to finding the center of rotation. Follow the directions below to locate the center of rotation, taking the figure at the top right to its image at the bottom left - a. Draw a segment connecting points 𝐴 and 𝐴′.
b. Using a compass and straightedge, find the perpendicular bisector of this segment.
c. Draw a segment connecting points 𝐵 and 𝐵′.
d. Find the perpendicular bisector of this segment.
e. The point of intersection of the two perpendicular bisectors is the center of rotation. Label this point 𝑃.
Justify your construction by measuring ∠𝐴𝑃𝐴′ and ∠𝐵𝑃𝐵′. Did you obtain the same measure?
Exercises 4–5
Find the centers of rotation and angles of rotation for Exercises 4 and 5.
Lesson Summary
- A rotation carries segments onto segments of equal length.
- A rotation carries angles onto angles of equal measure.
Check out our most popular games!
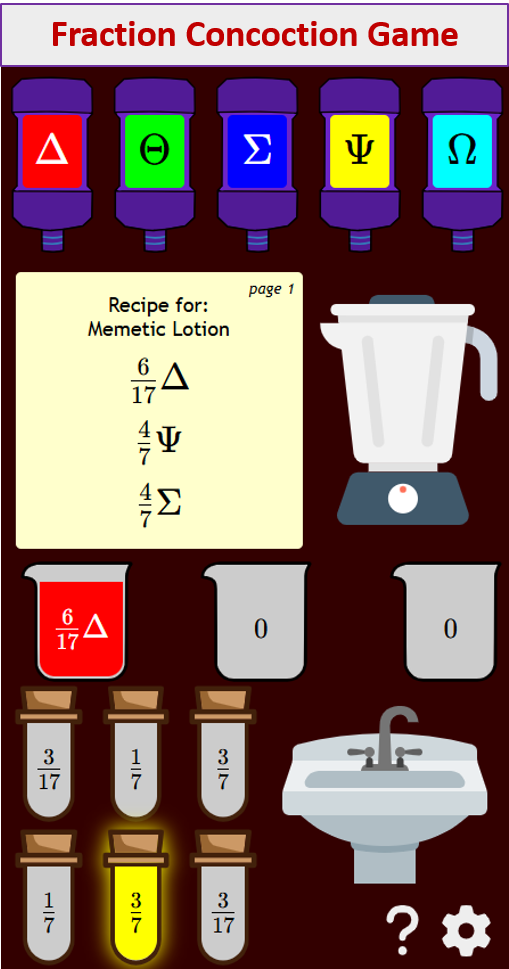
Fraction Concoction Game:
Master fractions in the lab: mix, add, and subtract beakers to create the perfect concoction!
Fact Family Game:
Complete fact families and master the link between addition & subtraction and multiplication & division.

Number Bond Garden:
Clear the board by matching number pairs that sum to ten in this garden-themed mental math puzzle.

Online Addition Subtraction Game:
Practice your addition and subtraction skills to help the penguin find its mummy.

We welcome your feedback, comments and questions about this site or page. Please submit your feedback or enquiries via our Feedback page.